Animatronics & Giant Props
How to Anchor a 12-Foot Skeleton Against High Winds
A twelve-foot prop is a lever, and the wind is pushing on the end of it. Everything below follows from that one fact.
Disclosure: we earn a commission from qualifying purchases made through links on this page, at no extra cost to you. It does not change what we recommend — here is how we choose.
The short answer
Screw spiral ground anchors in at the base instead of the supplied stakes, then add three guy lines from the upper torso to anchors set well out from the feet - roughly as far out as the line's attachment point is high. On concrete, swap anchors for heavy ballast at every foot. Re-tension after rain, and lower the prop before sustained winds get strong enough to move patio furniture.
A giant skeleton fails in wind differently from an inflatable, and the advice written for inflatables does not transfer cleanly. An inflatable is light, flexible and vents; it lifts, drags and tears. A twelve-foot skeleton is rigid, jointed and top-heavy, and it does not drag. It pivots at the base and goes over in one piece, usually taking a pole joint or a shoulder with it.
That difference matters because it changes where you spend your effort. On an inflatable, every anchor point is roughly equal and the job is to use all of them. On a rigid giant, the base anchors are the hinge and the guy lines are what actually hold the prop up. Most people over-invest in the first and skip the second entirely, which is why the failures all look the same.
Why the lever is the whole problem
Wind force on a prop rises steeply with wind speed - roughly with the square of it, so a wind twice as fast pushes about four times as hard. On a twelve-foot prop that force is applied high up, and the base has to resist it through a very short lever of its own: the distance between the feet. A pair of feet maybe two feet apart is fighting a push applied six to eight feet above the ground.
That is a losing ratio, and no amount of stake at the base fixes it, because the stake is at the wrong end of the lever. What fixes it is moving the restraint higher up the prop and further out along the ground, which is exactly what a guy line does. One line run from the upper torso to an anchor set well away from the feet does more than four stakes at the base.
The method, in order
1. Choose the spot before you choose the hardware
Free, and worth more than everything else on this page. Put the prop in the wind shadow of the house, the garage or a solid fence, on the downwind side relative to the direction your weather usually arrives from. A prop tucked into the lee of a building is in a fraction of the wind of the same prop standing proud in the middle of the lawn.
Avoid two specific spots: the gap between two buildings, which funnels and accelerates wind, and the open corner of a house, where flow separates and gusts swirl unpredictably. Both are worse than the middle of an exposed lawn. The full setup sequence covers siting in more detail.
2. Anchor the base to the ground you actually have
The stakes in the box are thin, short and intended to keep the feet from sliding on a calm day. Replace them. Spiral ground anchors screw in rather than drive in, which means they resist pull-out along their whole length instead of relying on friction, and they come back out in spring without a crowbar.
| Ground | What to use | Why |
|---|---|---|
| Established turf over loam | 12 in spiral anchors at every foot | Holds well; the soil grips the whole spiral |
| Sandy or recently dug soil | Longer spirals, set further out | Shallow holding power, so depth and spread compensate |
| Clay, dry and hard | Pre-wet the spot, then spiral anchors | Dry clay refuses the screw and cracks around it |
| Saturated soil after rain | Re-tension everything, consider lowering | Wet soil loses grip exactly when the wind arrives |
| Concrete, pavers, decking | Ballast at every foot, no stakes | Nothing to screw into, so weight is the only option |
| Mulch or gravel bed | Anchor through into the soil beneath | The bed itself holds nothing |
Set the base anchors so the strap runs outward and slightly down from the foot, not straight up through it. A strap pulling vertically does almost nothing against a prop that is trying to pivot.
3. Add guy lines, which is the step that matters
Three lines from the upper torso, spaced roughly evenly around the prop, with the strongest one facing the direction your wind usually comes from. Attach to a structural point such as a pole joint collar or the torso frame, and never to a hand, a jaw or anything cosmetic.
- Set the anchors out, not in. As a working rule, put each ground anchor about as far out from the base as the attachment point is high. A line fixed seven feet up wants an anchor around seven feet out.
- Keep the angle shallow enough to pull sideways. A steep line mostly compresses the prop downward; a shallow one actually resists the push. Too shallow and it becomes a trip hazard, so somewhere near 45 degrees is the practical compromise.
- Use three, not two. Two lines leave a direction with no restraint, and the wind will find it.
- Tension them snug, not tight. You want the slack out, not the poles bowed. Over-tensioned lines pre-load the joints and are a common cause of mid-season pole failure.
- Use something visible. Thin clear line at ankle height in a dark yard is how people get hurt. Dark strap with a reflective marker, or a small flag, keeps it honest.
A tie-down kit with straps and tensioners is easier to live with than rope and knots here, because re-tensioning takes seconds and you will be doing it repeatedly through October.
4. On hard surfaces, buy weight instead of anchors
A driveway display cannot be staked, and the substitute is ballast at every foot plus ballasted guy lines. Fill bags with sand rather than water where you can, because sand stays put when a bag gets nudged and it does not freeze. Two moderate bags per foot beats one heavy one, since you can spread them and keep the weight low.
Resist the temptation to lean the prop against the garage wall and call it anchored. Wind gets behind it, the prop pivots away from the wall, and the pole joint takes the whole load at once.
5. Stiffen the joints before the wind does it for you
On most giants the poles slot together with a push-fit or a single pin, and under repeated gust loading they work loose and rotate. Once a joint rotates the alignment goes, and the next gust has a bent prop to push on. Heavy UV-resistant zip ties through or around the joint collars stop the rotation for pennies, and cutting them off in November costs nothing.
Check the arms too. The arm assembly on a twelve-footer is a long moment arm of its own, and a loose shoulder joint flapping in wind is what turns a windy night into a replacement part order.
6. Re-tension on a schedule, not on a hunch
Walk the prop after the first heavy rain, after the first really gusty night, and then weekly. Soil that has been soaked and dried has moved, straps have stretched, and anchors have backed out a turn or two. Five minutes with the tensioners is the whole job.
When to lower it instead
There is no published wind rating for these props, and anyone quoting one is guessing. What is reliable is the behavior of the yard around you, so judge by that rather than a number on an app.
| What you can see | What to do |
|---|---|
| Leaves and small branches moving steadily | Fine. Normal October. |
| Small trees swaying, prop visibly flexing in gusts | Re-tension, watch it, consider lowering the arms |
| Patio furniture shifting, trash cans tipping | Lower the prop for the night |
| A wind advisory or storm warning for your area | Down and stored, no debate |
| Heavy rain plus wind on saturated ground | Down, because the anchors have lost the soil |
Lowering is not defeat, it is the reason to set the prop up so lowering is easy. If dropping it takes twenty minutes and two people, you will not do it, and that is how props get destroyed. Practice it once in daylight in early October and it becomes a two-minute job.
If the prop is coming down for a night rather than for the season, a waterproof cover over the lowered sections keeps water out of the motor housing and the eye module, which is the part that actually dies from exposure. For the full teardown, storing a 12-foot skeleton is the sequence to follow.
What breaks when anchoring fails
- Pole joints are the most common failure by a wide margin. They bend at the collar rather than snapping, which is harder to fix than a clean break.
- Shoulders and arm sockets go next, because the arms are long, they catch wind, and the socket is plastic.
- The head and eye module is the highest, heaviest single part, and it lands first.
- Base feet crack where the stake hole is, especially after a season of UV.
- Whatever the prop lands on - a car, a fence, a window, or a trick-or-treater. This is the real reason to take anchoring seriously.
The failure pattern is worth internalizing, because it tells you where to look during a walk-around. If a pole joint has started to bend, the prop is already compromised and more tension is not the fix - replacing the section is.
What we use for this
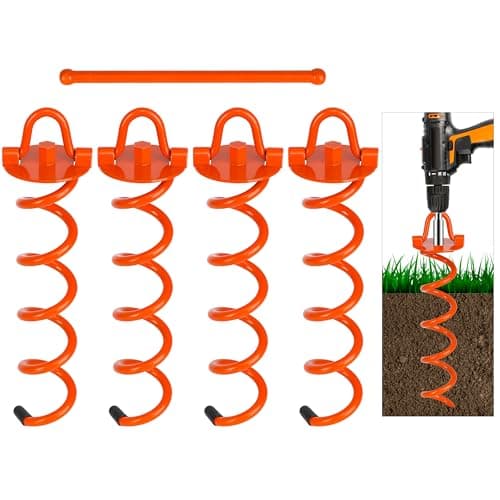
12 in Spiral Ground Anchors, 4 Pack
FEED GARDEN
The single highest-value upgrade in this whole category: the thin U-stakes in the box pull straight out of wet ground, and a corkscrew does not.
- Type
- Spiral or corkscrew ground anchor
- Common length
- 10 to 15 in
- Best ground
- Turf and soil, not gravel or hardstanding
- Installation
- Hand turned, no driving
Good
- Holds in saturated soil where a straight stake lifts
- Screws in by hand, so no mallet and no bent stakes
- Reusable season after season
Less good
- Useless on concrete, pavers or frozen ground, where you need weights instead
- Takes longer to install than driving a U-stake
- Leaves a visible plug hole in a manicured lawn
- Holding power9.2
- Ground versatility6.4
- Durability8.8
- Setup effort8.0
- Value9.0
#ad How we are funded - price as of November 4, 2026
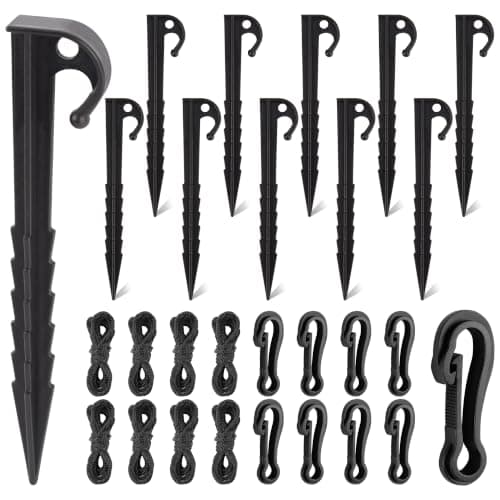
Inflatable Stake and Tie-Down Kit, 48 Pcs
Qumenan
Buy the kit so every anchor point has a strap, because the failure is almost never the strap you fitted. It is the two corners you skipped.
- Contents
- Straps, stakes, tensioners
- Anchor points
- Four minimum per inflatable
- Adjustment
- Cam or ratchet tensioner
- Reusable
- Yes
Good
- Enough hardware to do every corner rather than the front two
- Tensioners let you retighten after the fabric settles
- Works with inflatables, arches and lightweight rigid props
Less good
- Over-tensioning deforms the inflatable and stresses the seams
- Kit stakes are often the same thin stock as the ones you are replacing
- Straps are a trip hazard across a path unless you flag them
- Holding power8.0
- Ground versatility7.0
- Durability7.6
- Setup effort8.2
- Value8.6
#ad How we are funded - price as of November 4, 2026
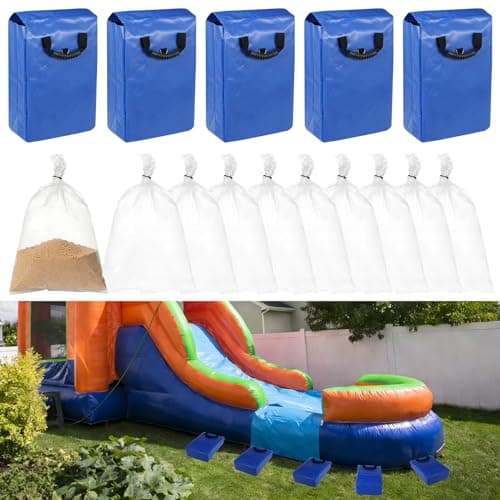
Waterproof Sandbag Anchor Weights, 5 Pack, 50 lb
Various
The answer on any surface you cannot drive a stake into. Double up per anchor point on a driveway, because a bag that slides is a bag that did nothing.
- Type
- Sand or water-fill anchor bag
- Surface
- Concrete, pavers, decking, rooftop
- Attachment
- Grommet or loop to a tether
- Storage
- Empties flat
Good
- Works where no stake will go
- Empties flat for storage instead of taking a tote
- Stackable per anchor point for larger displays
Less good
- Needs doubling up on larger inflatables or in real wind
- Sand has to come from somewhere and go somewhere
- Water fill is useless once it freezes
- Holding power7.8
- Ground versatility9.4
- Durability8.0
- Setup effort7.4
- Value8.4
#ad How we are funded - price as of November 4, 2026
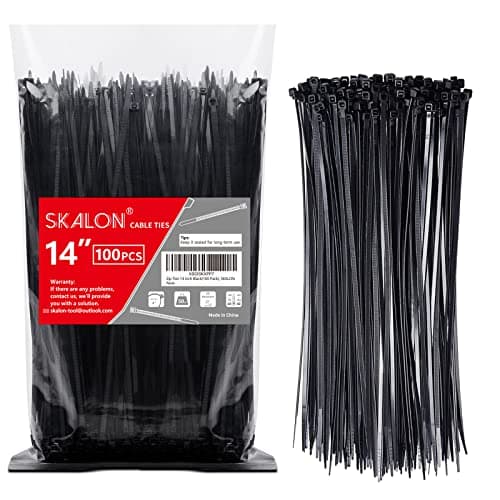
14 in Black Zip Ties, 100 Pack, 50 lb Tensile, UV Resistant
SKALON
Every outfit in this lane is sold with ties too short or too weak to hold it, and this is the fix - UV-rated so they do not go brittle halfway through October.
- Length
- 14 in
- Tensile strength
- 50 lb (listed)
- Quantity
- 100 per pack
- Weather
- UV resistant, black nylon (listed)
Good
- 14 inches wraps a giant skeleton's forearm or spine with enough tail left to pull tight
- UV-rated black nylon survives a month outdoors - clear indoor ties go brittle and snap
- Invisible at night against a dark fabric, unlike the white ties that come in the bag
Less good
- Single use - you cut them off, so a season of adjusting burns through the pack
- 50 lb is right for fabric and wrong for anything structural; do not use these to hold the prop up
- Cut ends are sharp and will snag the fabric you just attached if you leave the tail long
- Street presence5.0
- Build quality8.4
- Weather tolerance8.8
- Setup effort9.2
- Storage footprint9.6
#ad How we are funded - price as of November 4, 2026
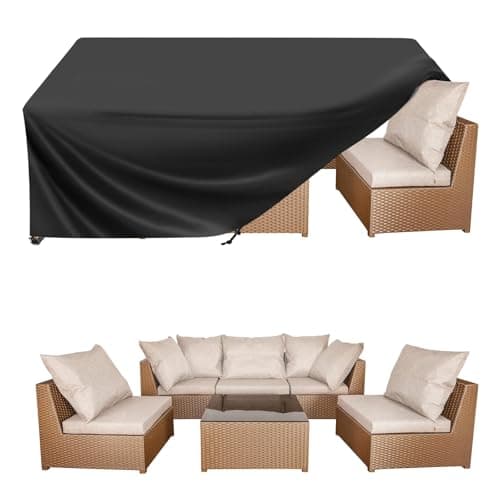
Heavy-Duty Waterproof Outdoor Cover
BALEINE
The pragmatic answer to a prop that is rated for light moisture and a forecast that is not: cover it overnight, uncover it at dusk.
- Material
- Coated polyester or vinyl
- Fit
- Size to the prop's standing footprint
- Securing
- Drawcord or strap
- Breathability
- Vented covers dry faster
Good
- Extends the life of a light-moisture-rated prop by whole seasons
- Cheaper than replacing one animatronic
- Doubles as the off-season dust cover in the garage
Less good
- Only works if somebody actually puts it on before the rain
- A non-vented cover traps condensation, which is its own problem
- Covers blow away, so they need tying down too
- Protection8.6
- Fit versatility7.4
- Durability8.0
- Ease of use7.6
- Value8.8
#ad How we are funded - price as of November 4, 2026
The same method, shorter
- Put it in the lee of a building, out of gaps between buildings.
- Spiral ground anchors at every foot, straps pulling outward and down.
- Three guy lines from the upper torso, anchors set out about as far as the attachment is high.
- On hard surfaces, ballast at every foot instead.
- Zip-tie the pole joints so they cannot rotate.
- Re-tension after the first rain, after the first gusty night, then weekly.
- Lower it when the patio furniture starts moving.
Everything above also applies, with less urgency, to other tall rigid props - weatherproofing decorations covers the rest of the yard. For inflatables the failure mode is different enough to be worth reading separately in anchoring inflatables against wind.
Frequently asked questions
How do you anchor a 12 ft skeleton so it does not blow over?
Spiral ground anchors at every foot instead of the supplied stakes, plus three guy lines from the upper torso to anchors set roughly as far out from the base as the attachment point is high. The guy lines are what actually hold it; the base anchors only stop the feet moving.
What wind speed can a 12 foot skeleton handle?
There is no published rating, and any specific number is a guess. Judge by what you can see: steady leaf movement is fine, visible flexing in gusts means re-tension and watch it, and patio furniture starting to shift means lower it for the night.
Do I need guy lines on a 12 ft skeleton or are stakes enough?
Stakes alone are not enough on an exposed site. The prop pivots at the base, and a stake sits at the wrong end of that lever. One guy line from the upper torso does more than four base stakes.
How do you anchor a giant skeleton on a concrete driveway?
Ballast at every foot plus ballasted guy lines, typically two moderate sandbags per foot rather than one heavy one, so the weight spreads and sits low. Do not lean it against a wall as a substitute; wind gets behind it and loads the pole joint all at once.
Should I take my 12 ft skeleton down overnight?
Not routinely, but yes before any wind advisory, before heavy rain on already-saturated ground, and on any night the yard furniture is moving. Set it up so lowering takes two minutes and you will actually do it.
Why do the pole joints on giant skeletons bend?
Repeated gust loading works a push-fit joint loose, it rotates, the prop goes out of alignment, and the next gust loads a bent pole. Heavy UV-resistant zip ties through the joint collars stop the rotation and prevent most of it.
About the author
Mike M.
Mike M. is the hands-on owner behind Iron Mako Media, which publishes Haunt & Hedge. The site covers the gear that builds a yard haunt, for the person who already decorates and adds one bigger piece a year.
Every pick here is chosen from manufacturer specifications, manuals, safety standards and verified buyer data. Read how we choose picks.